Getting a new iPhone is always exciting, but transferring your data can sometimes be daunting. Whether you’ve just received the latest iPhone 16 or another model, ensuring a smooth data transition is crucial. With the right steps, this process can be as simple as updating your social media status. There are four main methods to transfer your data from an old iPhone to a new one, and they vary based on the tools and situations you have available. These methods will cover everything from using iCloud backups to direct transfers, using a Mac or PC, and migrating from an Android phone to an iPhone. This guide will help you painlessly transfer all your old data to your new iPhone so that you can start using your new device right away without any hassle.
1. Restore from iCloud
During the setup process, you’ll be asked if you want to directly transfer apps and information from your old iPhone to your new one using Quick Start. This feature, first rolled out with iOS 12.4, may be entirely new to those who haven’t upgraded their phones in a few years. The easiest and quickest way to set up your new iPhone is to restore from a recent iCloud backup. As you walk through the initial setup process, select the option “Restore from iCloud Backup,” sign in with your Apple Account (which replaced the term Apple ID with iOS 18), and pick the most recent backup of your old iPhone.
If your backup is more than a day or two old, it’s worth taking an extra few minutes to create a new backup. To do so, open the Settings app on your old phone, search for “iCloud Backup” in the Search field at the top of the screen, and then click the matching result. Click “Back Up Now” to update the cloud backup. Once that finishes, go back to your new iPhone and select the backup you just created. Your phone will restore your settings and preferences, and in about 15 minutes, you’ll be able to start using your new device. The process continues in the background, downloading your installed apps.
Once everything is restored, you’ll need to sign back into any accounts you had on your old phone and go through your apps to ensure you’re still signed in. Dealing with this initial setup for your new iPhone using iCloud backup minimizes stress, allowing you to dive into exploring your new device with minimal interference. It’s a straightforward and efficient method, especially for those accustomed to backing up regularly on iCloud. This way, your transition to a new iPhone is seamless, allowing you to enjoy new features and improvements.
2. Apple Direct Transfer
If you do not have a recent iCloud backup or your Internet connection is slow, transferring everything from iPhone to iPhone, either wirelessly or via cable, is another efficient option. When the Quick Start process asks for the source, choose the direct transfer option. Make sure both phones are plugged in and charging to ensure they don’t run out of battery during the transfer process. Additionally, ensure you have a Wi-Fi connection and enough time for the process to finish, as it could take over an hour.
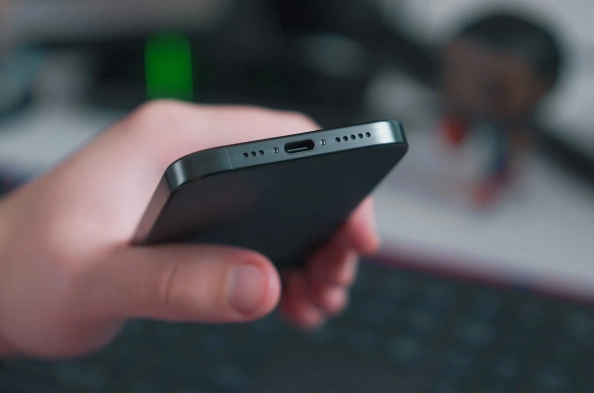
You can speed up the transfer process by connecting both phones with a USB cable. If your current phone is an iPhone 14 or earlier with a Lightning port, you might need an adapter. Apple provides detailed instructions on making a wired transfer work. The more data you have on your phone, such as photos in your camera roll, the longer the process will take. When the transfer begins, the phones will show you a time estimate, and based on previous experiences, this estimate is typically accurate within a few minutes. This direct transfer method is worth the time, especially if you don’t use Apple’s iCloud service to back up your phone.
Choosing direct transfer ensures that your apps, settings, and personal information move directly to your new iPhone without needing an internet-dependent backup. While this option may take a bit more time upfront, it provides a direct and often more reliable transition, enhancing your experience with the new device. This setup method allows you to keep your data intact and ready for use, reducing the risk of missing important information or having to reconfigure your settings manually. If you prefer a hands-on approach and have both devices readily available, direct transfer provides a solid alternative to cloud-based backups, ensuring a thorough and accurate data migration.
3. Use a Mac or PC
Restoring from an encrypted backup using a Mac or PC is another preferred method for setting up a new iPhone. This process not only transfers all your apps, settings, and preferences but also eliminates the need to sign into countless apps over again. Creating an encrypted backup of your current iPhone is essential before utilizing this method. While it may seem intimidating or overly complicated, it merely involves checking an extra box and entering a password.
On a Mac, you’ll need to use Finder to back up your old iPhone. This procedure was outlined when Apple transitioned away from iTunes. Make sure to check the “Encrypt backup” box and enter a memorable password when prompted. Let your Mac create a backup file and notify you when it’s done. This encrypted backup method is secure and ensures that all your data, including passwords and other sensitive information, is thoroughly protected.
On a PC, iTunes is required (yes, it’s still alive) to create a backup. Make sure to check the “Encrypt backup” box and enter a password as well. To restore your new phone, open Finder or iTunes and connect your phone to the computer. Click “Trust” when prompted and follow the instructions, selecting the backup you just created for the restoration process. Remember to enter the backup’s password before the procedure begins. Once done, your new phone will be an exact replica of your old phone, and you won’t have to spend much time signing in to various apps or accounts.
This backup method is incredibly efficient for users with extensive data and many installed apps. Ensuring a seamless transition, it leverages the existing infrastructure of your Mac or PC, promising a smooth setup process without much delay. Encrypted backups offer the added advantage of securing sensitive information, making this method a trusted and reliable way to migrate to a new iPhone.
4. Move to iOS for Android Users
Switching from an Android phone to an iPhone can be thrilling but potentially overwhelming if you’re not familiar with the process. Whether you’re moving to the latest iPhone 16 or another model, ensuring a smooth data transition is essential. Apple provides a handy app called “Move to iOS” that helps you transfer your data quickly and efficiently.
To get started, download the “Move to iOS” app from the Google Play Store on your Android phone. During the setup process of your new iPhone, select the “Move Data from Android” option. Open the app on your Android device and follow the on-screen instructions. When prompted, enter the code displayed on your iPhone into the Android app. This code securely connects the two devices over Wi-Fi, allowing you to transfer your contacts, message history, photos, videos, web bookmarks, mail accounts, calendars, and some of your apps.
The process may take some time, depending on the amount of data you have. Once the transfer is complete, continue setting up your new iPhone. You may need to download any iOS-specific apps and sign back into your accounts, but most of your data should now be available on your new device.
By following this guide, you can effortlessly transfer all your data, allowing you to start using your new device immediately without any headaches. This guide aims to make the transition seamless, covering every aspect to ensure you don’t lose any important information. Whether it’s photos, contacts, or apps, this comprehensive approach guarantees your new iPhone is ready with all your essential data, making the switch as smooth as possible.


